
When you create documents with a word processor, you will quickly notice that many of them are quite similar. Letters tend to have the same layout, so do invoices, meeting notices, etc.
Some TextMaker users start every letter from scratch, others use the predefined templates. Adventurous users open an old document, delete the text and enter new text, then save the new document under a new file name. This is risky: All too often, they forget to pick a new name and accidentally overwrite an old document.
A better approach is to set up a custom document layout and save it as a re-usable document template. This is not as scary as it may sound – let's work through the process one step at a time.
Even though document templates can save a lot of time and headaches, many word-processing users employ a quick-and-dirty approach instead: They format a document the way they want it and proceed to use this file as the basis for all further documents of the same type. This approach has several drawbacks, the main one being that users can inadvertently overwrite their old files. If they catch the error soon enough, they can recover the old version from a backup file.
Another drawback of the quick-and-dirty approach is that users tend to forget updating some of the data from the original letter, such as the date or recipient's address. Imagine the puzzled stare of the recipient of a letter dating back to 2017... in 2019! Or when Mr. Emerson receives a letter that starts with "Dear Mrs. Miller" – oops.
The clean approach is to use templates. Many users don't realize that when they press Ctrl+N to create a new document in TextMaker, they are already using a template: the default template set up by SoftMaker, a file called Normal.tmvx and located in Documents\SoftMaker\Templates 2018\English.
Customize the default template
Let's start small – by customizing this default template a bit. First, back up the Normal.tmvx file by saving it under a different name: "Normal (original).tmvx" should do. Now you can open and edit Normal.tmvx knowing that you can always return to the default if you need to.
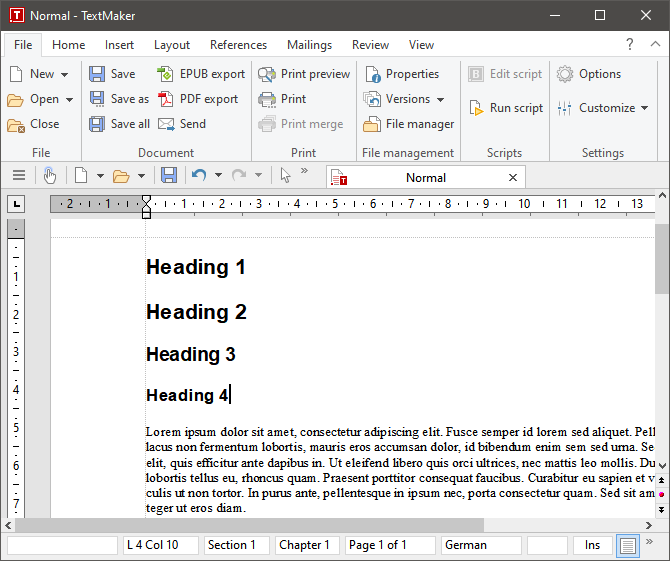
Type a few paragraphs of dummy headings and text into the template. Format the headings with the paragraph style "Heading 1". You will notice that the standard font for headings is Arial, whereas the body text uses Times New Roman by default. Let's modernize things a bit. Select a heading paragraph and format it with a font of your liking from the font dropdown menu. I chose "Cambria" because it looks classy. Now right-click on the selected heading and choose Paragraph style from the context menu. In the middle column of the Paragraph style dialog box, click on Update from text, then click Apply to exit the dialog box.
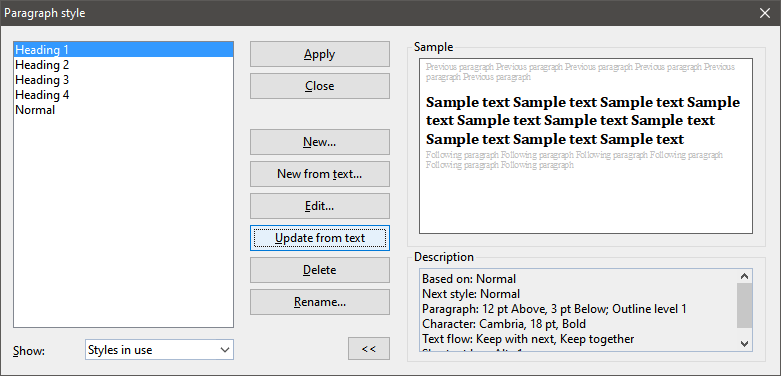
From now on, all headings in this document will be displayed in the Cambria font by default – including "Heading 2", "Heading 3" and "Heading 4", because they inherit their font from "Heading 1".
Now select a paragraph of body text – the quickest way to do this is to triple-click on one spot within the paragraph. Choose a font to your liking from the font selection menu. I chose "Calibri" and set the font size to "11" for better legibility. Update the paragraph style "Normal" as described above. All paragraphs formatted as "Normal" should now match the new font. This is a good opportunity to adjust the paragraph style even further, using the Edit button from the Paragraph style dialog box. One possible adjustment is to set up additional paragraph spacing, for instance "5 pt" before and after each paragraph.
Select the whole text (Ctrl+A or Home | Select all), then press the Del key to clear the contents of the document. Once you save the template, all new documents created with Ctrl+N will use your new default paragraph settings.
Customize a different template
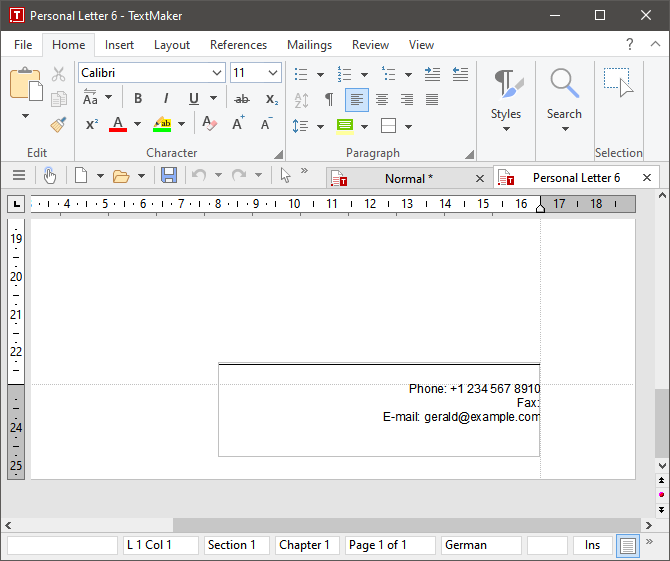
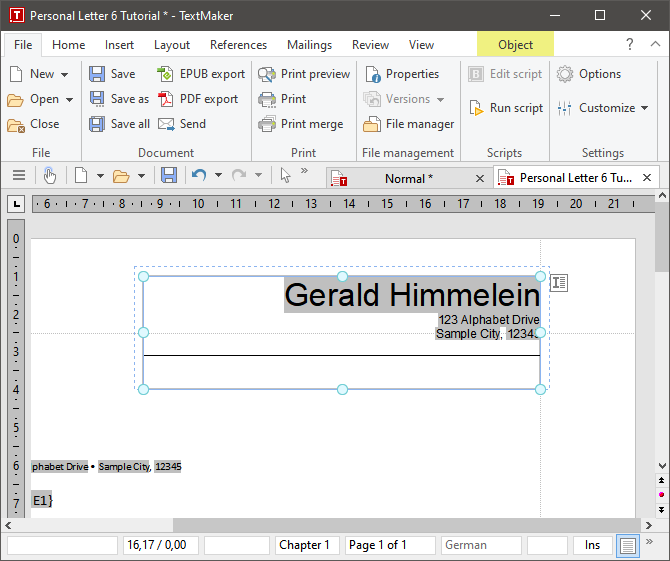
The same principles can be applied to other templates. Templates can also contain fields which TextMaker will fill out automatically. Take the template "Personal Letter 6" for instance (File | Open, navigate to Documents\SoftMaker\Templates 2018\English\Letter and choose Personal Letter 6.tmvx). Provided that you have previously filled out your personal information using the User info button on the General tab of the dialog box File | Options, this template will automatically insert your name, address and phone number in several predefined fields.
However, note that the template may not completely fulfill your needs yet. In the following steps, I will show you how to:
- set up a copy of the template
- adjust the preset fields
- set up the address information fields to appear on subsequent pages
First, save the template under a new name, such as "Personal Letter 6a" or "Personal Letter 6 (custom)". Next, you can adjust the default font in the way described above.
Be wary of applying your manual font changes for the letterhead and footer to the paragraph style – this will change the formatting of all other areas of the document as well. If you want to set up a different font for the letterhead and footer without affecting the body text, be sure to make your changes to the predefined paragraph styles "Header" and "Footer" respectively.
Customizing the letterhead
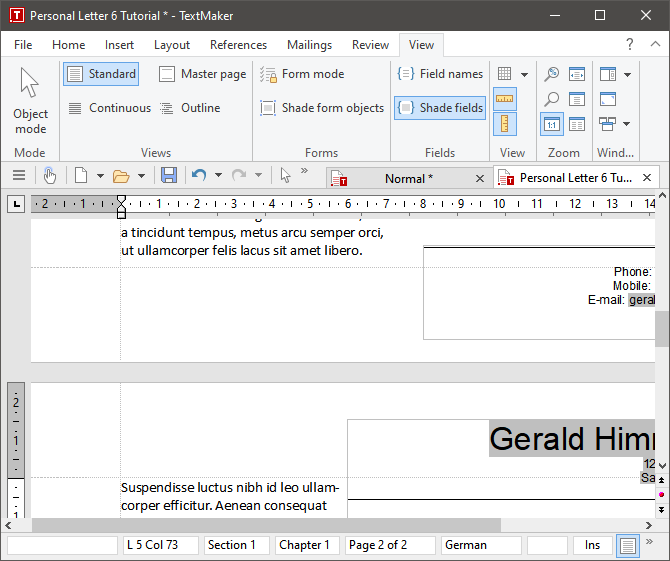
Next you will notice that the footer has a stray line: Since no fax number has been given in the User information dialog box, the space after "Fax:" remains empty.
Instead of heading out and buying a fax machine, we may choose to delete the line. To do this cleanly, you should first make all field names visible: On the View tab of the ribbon, select "Field names" and "Shade fields".
Now you can select the line "Fax: {User.Fax}" and delete it. This is a great opportunity to add more information from the user fields, for instance your mobile number. Type "Mobile: " into the space previously occupied by the fax placeholder, then add a user field through Insert | Field | User info | Phone 2. The line should now display "Mobile: {User.Phone 2}".
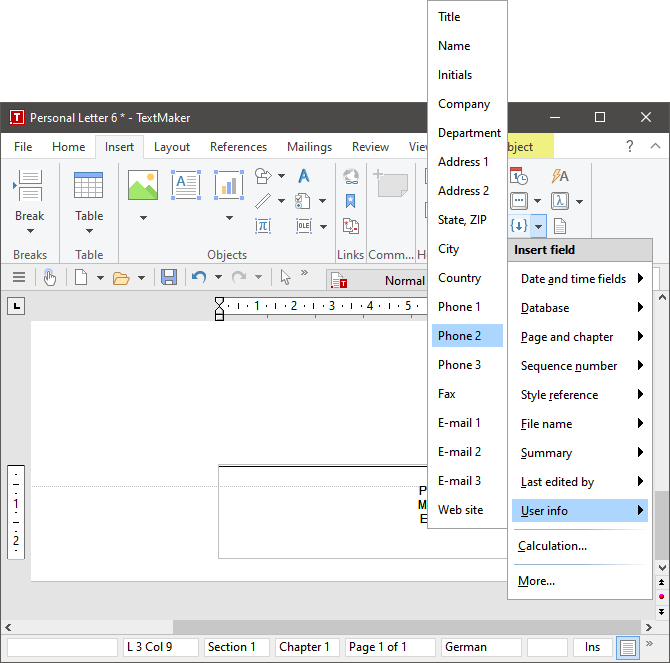
For international letters, you may want to add the "Country" field from your user info to the letterhead – the procedure is essentially the same as with the mobile number.
Once you're done customizing the user info fields to be displayed in the letterhead and bottom, revert to the regular display mode by returning to the View tab of the ribbon and unchecking "Field names". I usually leave "Shade fields" on for further refinements. If the layout now displays nothing where you previously inserted an "User info" field, check whether you have filled out these fields in the "User info" section of the Options dialog box.
Customizing the master page
If you fill the body of the letter with text, you will soon realize that the template includes your name and address only on the first page. If you click on the gray margin of the letterhead, you will spot a ship's anchor symbol at the left edge of the page. This means the text frame is anchored to the beginning of the page – as is the frame containing your phone number and e-mail address.
This setup is fine for short letters, but what if your letter is running long and requires more than one page? The dead-simple solution is to keep your letters short. A more workable approach to this problem is to move these page elements to the master page.
Master pages are a common features in desktop publishing software. To make sure that certain design elements repeat on all pages, designers place these elements on a separate page. Page numbers and other data that fits in a single line can be moved to headers and footers, but larger blocks of text and graphics reside better on the master page.
As in a desktop publishing package, master pages are set up using object frames. TextMaker supports several frame types, including text and picture frames. They are inserted through the Options section of the Insert ribbon. Since the current letterhead elements are already located in text boxes, all that is left to do here is to move them to the master page so that they will repeat on every page.
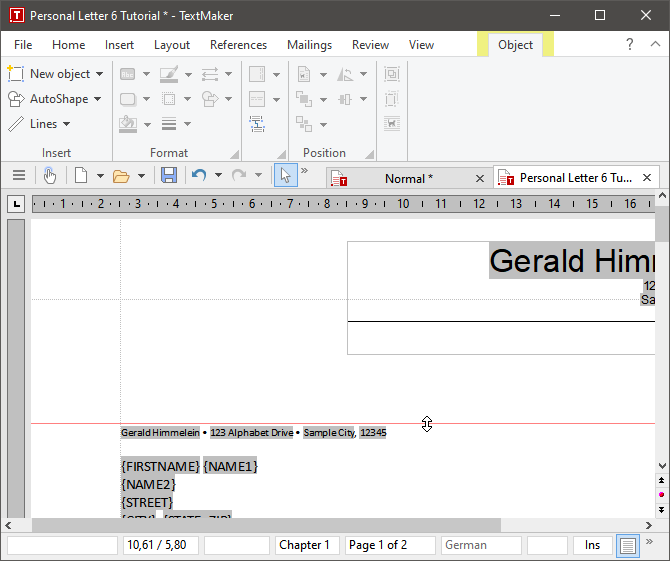
One click on the top gray frame will turn its border blue and show eight dots used for resizing. Ignore these dots for now; instead click on the frame edge. Hold down the Shift key on your keyboard, then select the bottom frame in the same way. Now cut them from the page using Home | Cut.
Switch to the master page using View | Master page and paste the boxes in place with Home | Paste. Switch back to standard view with View | Standard, and you will notice that the page looks exactly as it did before. To see the difference, you need to add a few paragraphs to the body text. As soon as the text flows to the following page, you will see the change.
Final adjustments
However, you may also see a few problems: The text flows around the fixed elements in a somewhat unfortunate way. Also, you can still move the boxes in standard mode by accident, destroying the layout. A devious tutorial writer might leave this situation as a problem for the reader. Don't despair, though...
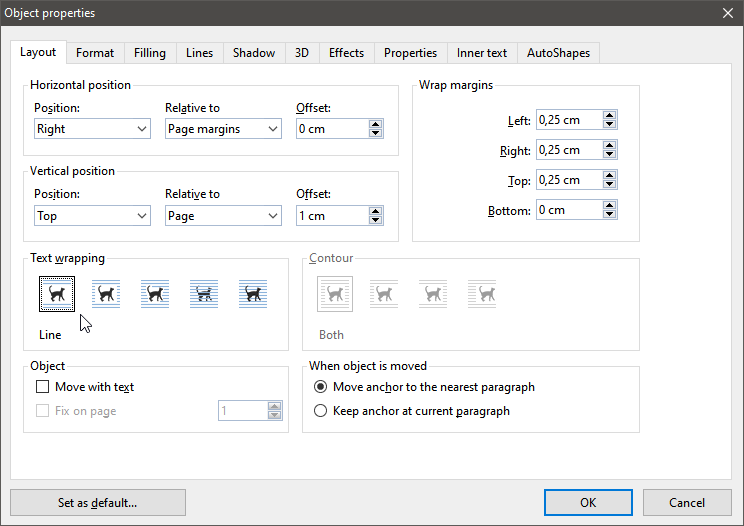
The formatting problem is fixed fairly easily by changing the text wrapping mode of the frames. However, this change will cause a new problem with the top frame: The address fields will automatically move downward to make room. To prepare for this, set up a guide line at the current position. Switch to Object mode using View | Object mode and click-drag the mouse pointer from the upper ruler to the position where the address fields begin.
Switch back to Standard mode and select one of the text frames. Right-click on its border to open its context menu and select the bottom item, Properties. The Object properties dialog box may seem daunting, but luckily it is organized very well. Click on the Layout tab and select the leftmost option under "Text wrapping". Do the same thing with the other text frame.
To solve the problem with the shifted address text, click into the body of the document, move the cursor to the top (easily done with Ctrl+Home) and carefully press the Delete key until the address lines up with the guide line again. You can now delete the guide using View | Grid and guides | Guides | More and the Delete button on the Guides tab of the dialog box.
Now that everything is set up, you should lock the master page elements in place. This is done in the file properties: Open File | Properties and switch to the View tab. The section "Locking" includes the option "Lock objects on master page". Once this is set, the text frames will only be editable in the "Master page" view mode.
Save the result and you have a brand new multi-page letter template. (Whew.)
You can download the final document template here.
The second part of this tutorial will look at more complex uses of the master page, including recurring logos, freely positionable page numbers and even – gulp! – multiple master pages in a single document. See you next month!
Comments
also i noticed if i write out a document it gets saved automatically in the documents folder (i think) but i dont work that way-i have some on my desktop and the others are stored in various places, i have hundreds of folders, because i dont send letters or do any one thing with the documents i make, i have different uses for them but they all require the same template. is there a way to get them automatically directed to the desktop and let me file them later where i decide to?