
After learning the basics of TextMaker templates and the mysteries of master pages in part 1 of this tutorial, it's now time to take things a bit further.
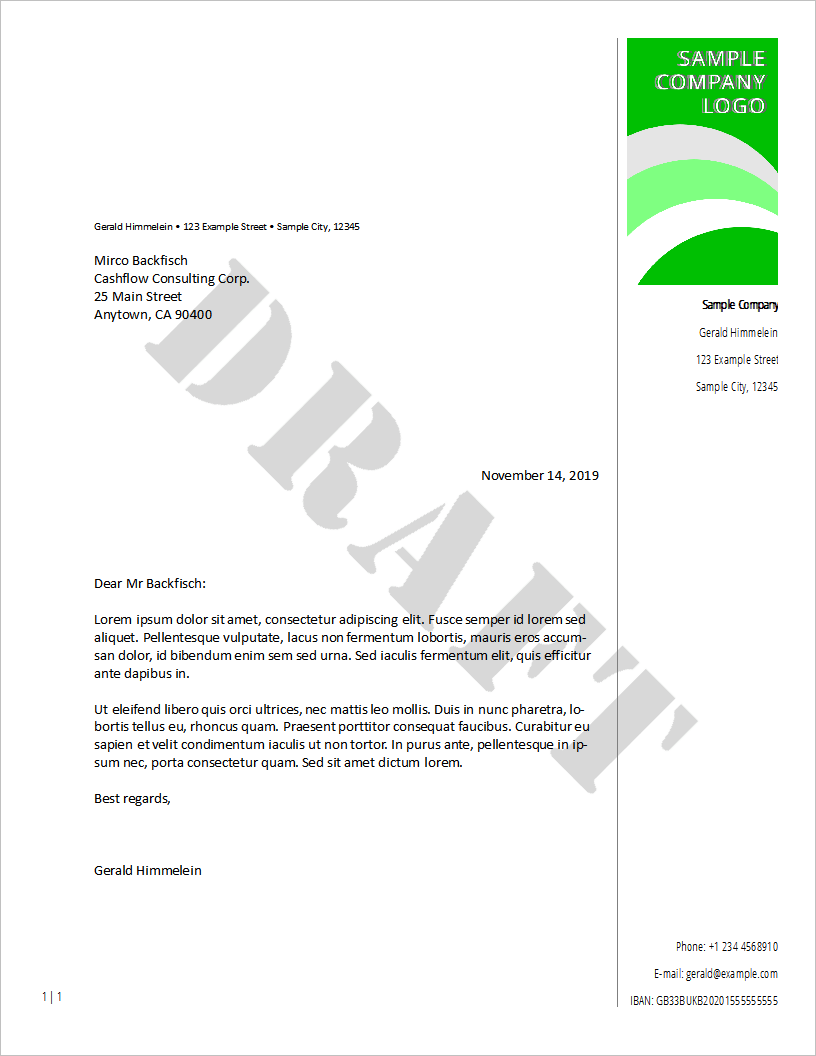
To illustrate the possibilities, we will create a letter template with a second column which contains a logo, page numbers and a fixed background image (a watermark).
To follow this tutorial closely, you can click here to download all the images used in this project.
Designing a fancy letterhead
I like to base designs on existing templates, mostly as a time saver. So let's start over with the "Personal Letter 6" template from part 1. Before beginning, make a copy of the template as described before.
To begin editing the template, set up a new paragraph style for all letterhead elements: First select the text in the bottom text field, choose a more appealing font (Home | Character), right-click on the selected text block, choose Paragraph style from the context menu and then click on the New from text button to create, say, the paragraph style "Letterhead". Once you're satisfied with your paragraph settings, click on OK and apply the paragraph style.
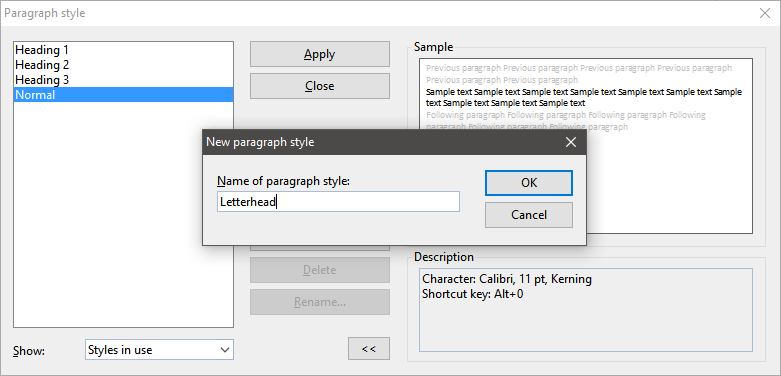
I chose Open Sans Condensed Light at 10 pt and set the line spacing to "Multiple, 1.5 lines". Next, I applied the same paragraph style to the upper letterhead. Yes, I know, the result doesn't look like much – yet. But we're only starting out.
In the next step, I deleted the horizontal lines from the letterhead elements using the arrow and Backspace keys. Then, I customized the fields to be displayed in the letterhead. I added a company name to the upper part and a bank account number to the lower part. Don't try to send me money, it's a dummy number.
Setting up the page margins
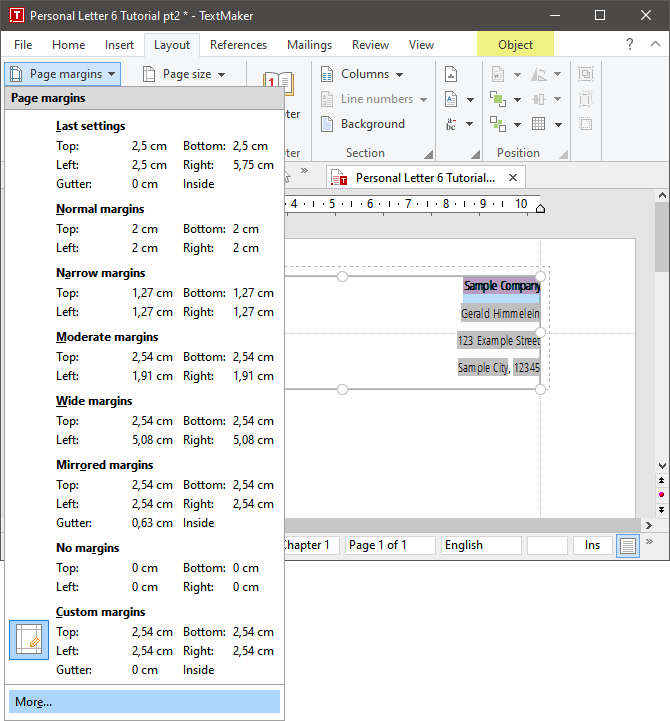
To set up a letterhead on the right hand side, it’s necessary to give the recurring elements some space to breathe by editing the page margins. This is done through Layout | Page margins | More. I chose 2.5 cm for all margins but the right one, which I increased to 5.5 cm.
The following steps can be carried out either on the master page or in normal view. I prefer to use master page mode because it keeps the modifiable content (date line, salutation and other similar data) apart from the fixed design elements (letterhead, logo, page numbers). Put bluntly: It's less confusing this way.
So, let's transfer the existing text frames to the master page. This is done as described in part 1: Select both text frames using Shift-click, cut them from the page with Ctrl+X, activate the master page view with View | Master page and paste the boxes in place by pressing Ctrl+V.
Now it's time to move the two text frames to the empty space on the right hand side. There are several ways to achieve this, but the easiest is to use the Properties dialog. For the top text frame, choose the horizontal position "Right, Relative to Page, Offset 1 cm" and the vertical position "Top, Relative to Page, Offset 7.8 cm". On the Format tab, set the width of the frame to 4 cm. To adjust the frame height, you can either use the mouse or the Format tab of the object properties dialog.
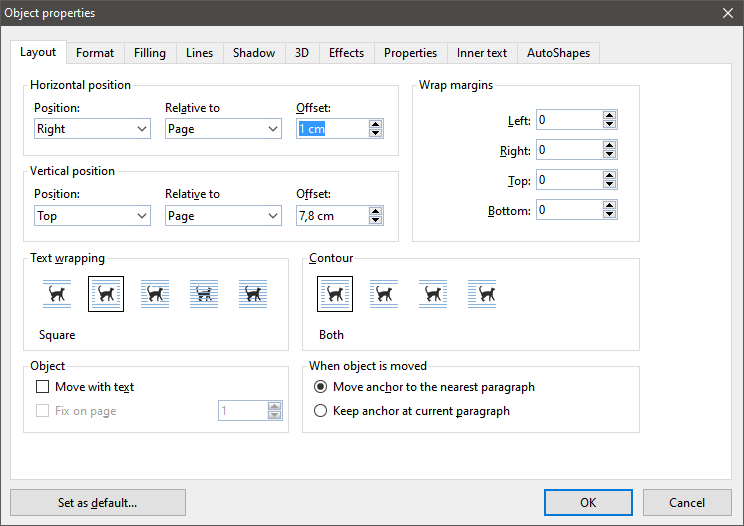
Similar adjustments move the bottom text frame into the empty area: Set the horizontal position to "Right, Page, 1 cm" and the vertical position to "Bottom, Page, 1 cm". To make the text align to the bottom of the frame, click on the tab Inner text and set the vertical alignment to "Bottom" – it's the third icon from the left. Before closing the object properties dialog, adjust the frame to the same width as the top frame (i.e. 4 cm).
This is a good opportunity to set up a horizontal guide line for the position of the address field of the letter, as described in part 1: After returning to standard view, choose View | Object mode, then drag the mouse pointer from the upper ruler until the guide touches the upper edge of the line with your postal address.
Placing a logo
In case you are wondering about the large blank hole on the top right: This space has been reserved for the logo. Remember to switch back to master page view before continuing (View | Master page).
This tutorial uses a narrow sample logo. It is imported to the master page using Insert | Picture and selecting the image file – in this case, a PNG I prepared earlier.
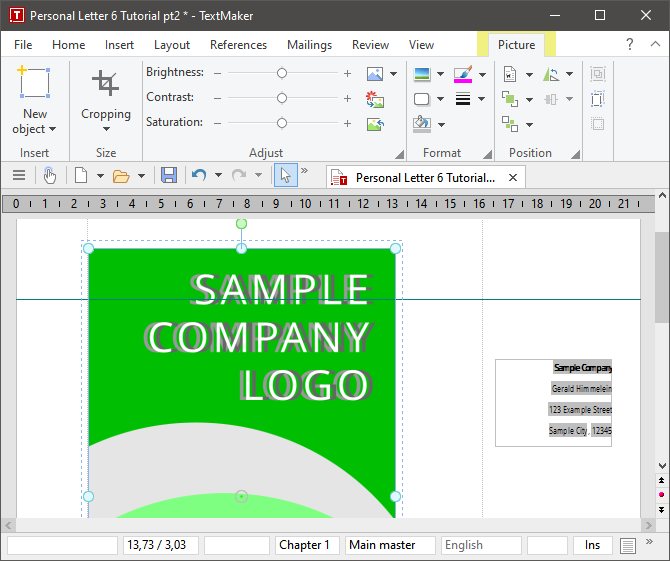
Whoa. Note how TextMaker places the logo smack dab into the top left of the page. Instead of scaling and fitting the logo using the mouse, let's use the more precise Picture properties dialog box. Right-click on the image and select the corresponding menu entry.
In the Layout tab of the object properties dialog box, set the horizontal position to "Right, Relative to Page", with an offset of 1 cm. Keep the vertical position at "Top, Relative to Page", but change the offset to 1 cm. If you were to click on OK now, you'll merely have moved your problem. Let's instead fix the scaling as well.
Switch to the Format tab of the object properties and make sure that the checkbox "Keep aspect ratio" in the "Scaling" section is checked. Under Size, set the width value to the same number you wrote down when you resized the text frames. (In case you didn't, it was 4 cm.)
Depending on the height of your logo, you might have to move the top text frame downward a bit. This can either be done with the mouse by fiddling with the middle dots of the horizontal frame border, or by editing the text frame's object properties to increase the vertical position.
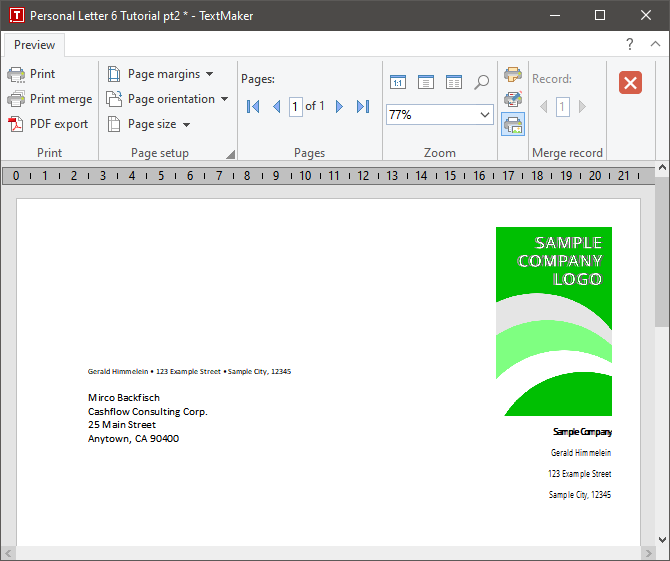
To see how things have come along without being distracted by guidelines, switch to File | Print preview. Looks nice, but perhaps a bit too loose.
A vertical line could help separate the letterhead data from the body text. Close the print preview, return to master page view and choose Insert | Lines | Line. Click on a spot between the top of the sample logo and the right page margin, hold Shift and drag the mouse down until you reach the bottom of the footer.
The Shift key modifier constrains the line and rotation angles. Lines are constrained to 45 degree increments, picture frames rotate in 22.5 degree increments. The latter will become important further on.
The result is a thin vertical line, spaced more or less evenly between the logo and the right page margin. In case the position or length aren't quite right, the line can always be adjusted either using the mouse or – you've probably guessed it already – its Properties dialog box.
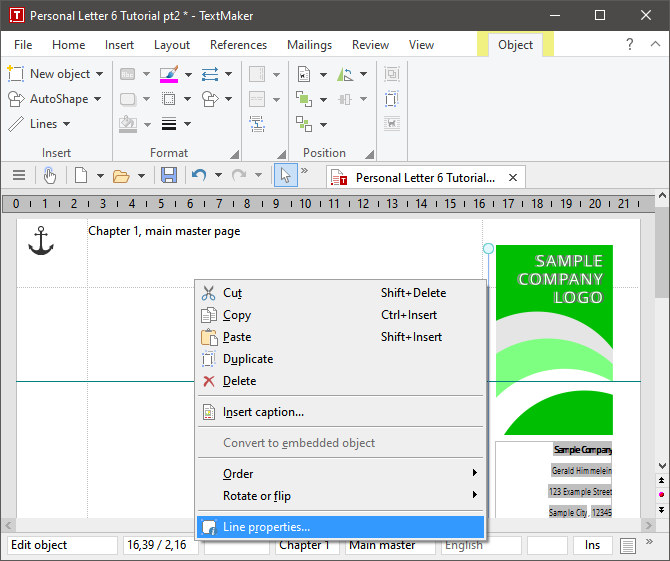
For the latter approach, right-click on the line and select Line properties from the context menu. To make things easier for me, I set the horizontal position to "Right" and adjusted the offset to 5.25 cm. Then I made sure the offset for the vertical position was an even 1 cm.
The length of the line could also be adjusted through the Properties dialog box (Format tab, "Height"), but this approach is cumbersome since there is no "Apply" button – you'd have to change the height value, click OK, check the result, re-open the line properties, edit the value, click OK ... Instead, I chose to drag the bottom point of the line to an acceptable height by hand (with some aid from the Shift key).
A quick check of the results in the print preview – yeah, that looks decent. At this point, I decided to set the line color to 50% gray (Object properties, "Lines" tab) and I widened the right-hand page margin to 5.75 cm – but these steps are entirely optional. Should you decide that you want the paragraphs of your letter to be justified, you might want to add another couple of millimeters to the right margin.
Now all that's really missing is the page numbering.
Setting up advanced page numbers
The standard way to set up page numbering is by using the footer. Let's go through this real quick: From the Insert ribbon, select Footer – you can either pick the standard footer by clicking on the icon or one of ten layout presets by selecting the arrow icon. Note that TextMaker immediately moves the cursor to the footer and that the ribbon switches into header and footer mode. From here, click on the drop-down arrow of Insert | Field and choose Page and chapter | Page number – and you're done.
For a more ambitious template, the approach is similar. However, the goal is to have the page number located next to the body text instead of below. To achieve this, first place a new text frame outside the page margin – I picked the lower left. Tutorials frequently tell you that a particular thing is "really simple to do" and then make it incredibly difficult to follow the process because they skip a lot of steps. Let's do this as a bullet list (even though it's really simple):
- Make sure you're in master page view (View | Master page).
- In the ribbon, choose Insert | Text frame.
- With your mouse, click-drag a rectangle in the lower left corner beyond the page borders.
- Right-click on one of the borders of the text frame. Choose Properties from the context menu.
- On the Layout tab of the object properties dialog, set the horizontal position to "Left, Page, 1 cm" and the vertical position to "Bottom, Page, 1 cm".
- On the same tab, set the wrap margins to 0 cm in all four directions.
- On the Format tab, set the width to 1,25 cm.
- On the Inner text tab, set the vertical alignment to "Bottom" (third icon from the left) and close the object properties dialog via the OK button.
- Click into the text frame and choose the paragraph style "Letterhead" you created way back from Home | Styles.
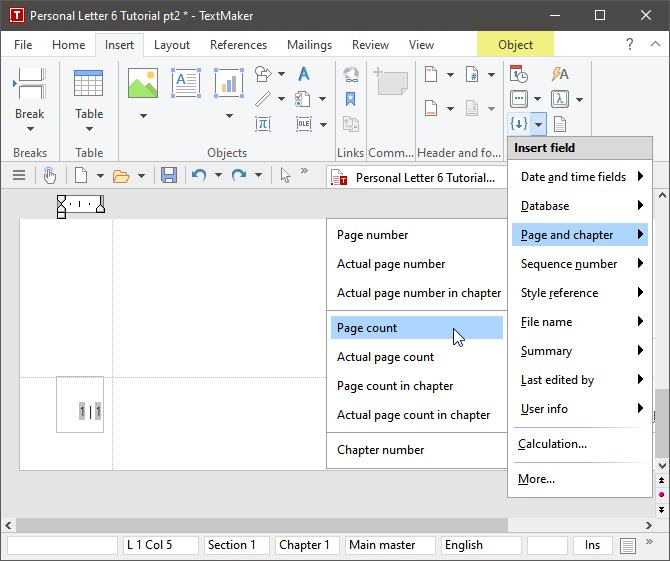
- On the Insert ribbon, click the drop-down arrow next to Field and choose Page and chapter > Page number.
- Type a | character surrounded by spaces (" | ").
- From the Field menu, choose Page and chapter > Page count.
We're done. Now wasn't that simple?
Setting up a watermark
Let's complete this letterhead with a watermark. You might want to place a logo behind the body text, or perhaps place a big stamp to indicate that this is only a draft version. Let's do the latter since it is only a slightly more complex version of the former.
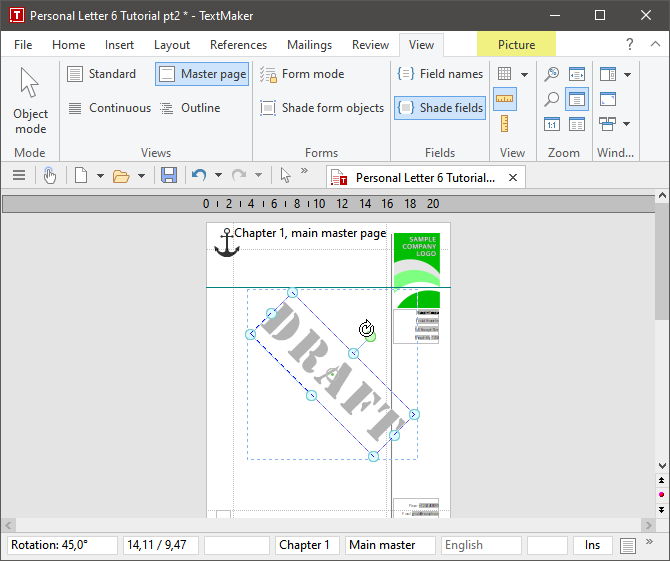
First, make sure you are in master page mode. Insert a picture frame in the same way as you inserted the logo (Insert | Picture). Again, a sample image is included in the download accompanying this tutorial. The image will appear centered in the top quarter of the page. Click-drag the picture frame into the center of the page. Now Shift-click on the green circle above the picture (this constrains the rotation angle) and drag it to the right until the status line indicates "Rotation: 45,0°".
The result still has several issues: First off, the image is floating above everything else – a watermark should be in the back. Second, it's a bit too dark. Third, it could be larger. Let's address these issues one at a time.
The first step is to send the image to the back and make sure that text won't try to wrap around it. Provided the image is still selected, TextMaker should be displaying the context-sensitive ribbon tab Picture. In the "Position" section, set the wrapping Mode to "Behind text" and click on Send to back. Next, set the brightness slider in the ribbon tab Picture to +15% or +20%. To enlarge the image, you can either drag one of the light blue corner dots or open the Object properties and on the Format tab, set the scaling to 110% or 120% (before clicking OK, make sure "Keep aspect ratio" is still active). Since TextMaker uses the top left corner of the image box as the scaling anchor, you will have to reposition the watermark after scaling.
One more step remains. To make sure that none of the design elements are moved by accident while editing the letter, go to File | Properties and on the View tab, activate "Lock objects on master page". If you now switch back to standard view, the text will politely ignore the watermark and all design elements will be locked onto their positions on the page.
Setting up multiple master pages
If you require multiple master pages for a document, you can set them up through the Chapter dialog box (Layout | Chapter). When you check the option "Different first page" under "Master pages", you may initially be surprised because the master page will still only show you one option.
However, once you start adding dummy text to your page (Lorem Ipsum generators are a great source for dummy text paragraphs), the master page view will show you two master pages: "first master page" and "main master page." If you additionally check "Different left and right pages" in the Chapter dialog box, you will have three master pages: "first master page", "left master page" and "right master page."
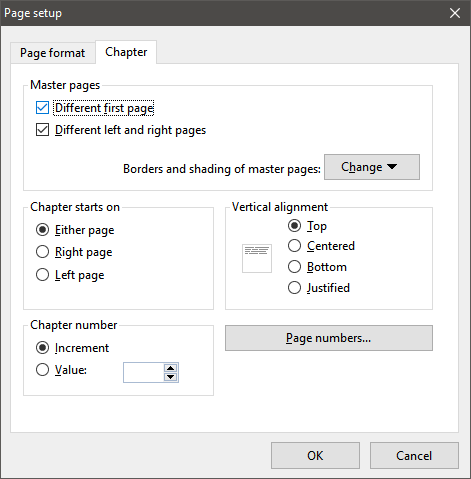
You can now edit all these master pages separately. For even more variety, you can set up different chapters. Every chapter can have up to three master pages (first and main, or first, left and right). Please note that text can't flow across chapter breaks.
Comments
Maybe an article on making address labels in TextMaker using a spreadsheet in PlanMaker. The article should cover updating the TextMaker file when ever the data in the PlanMaker file is changed.
Again thanks and have a great Christmas season.
enjoying your SoftMaker tips very much. One aspect of TextMaker I feel needs special attention is the in-built Bibliography function. I feel that it is an aspect really underutilized, perhaps because of the dBase 4 format. As a researcher I am in and out of literature databases often, using tools like Zotero (primarliy), Mendeley or EndNote, and I have found integration with TextMaker very frustrating as a result. Any tips on importing databases across into dB4 format for in-text citation and bibliography formatting within TextMaker would be warmly appreciated! Cheers :)
Why don't you add your product to the Ubuntu and elementaryOS AppCenters btw? You would gain a lot more customers :)
Technical support: https://www.softmaker.com/en/support-assistant