Dear SoftMaker customers:
In the second part of our "Tips and tricks" series, Klaus Bailly, our guest author and a SoftMaker volunteer, explains how you can print out a multi-page TextMaker document in the form of a booklet: namely by fitting two regular pages each on each side of an A4 or Letter sheet. The objective is to receive a stack of printed pages, which can be made into a booklet by simply folding them in the middle.
Proceed as follows:
1. Prepare the document
Although it would seem obvious, you may not use a double-sided layout for your document. This means you should neither make landscape pages with two columns nor text frames placed side by side. While this may look on the screen like an open page from a booklet, it makes the printout as a brochure impossible. Instead, please only use a perfectly normal layout with regular pages.
In TextMaker, go to the page setup by clicking the little icon in the section "Page setup" on the Layout tab:

In the Page setup dialog box, check the option "Mirror margins". Next, set the outer margin wider than the inner margin (rule of thumb: one-and-a-half to two times as wide):
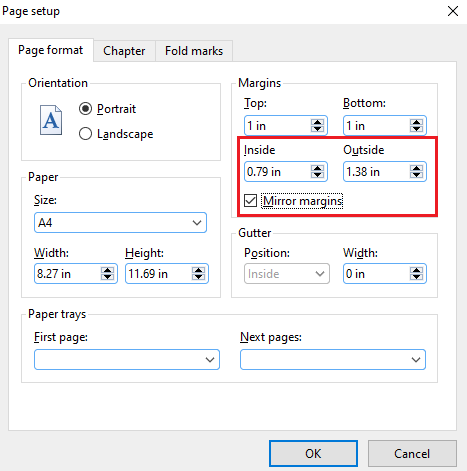
Please leave the paper size at A4 or Letter. Don't select the desired size of the finished booklet (A5, in this case).
Remember that the pages are reduced in size by half during printout, and therefore choose suitably large font sizes, line spacing and margins for the document.
Tip: Page numbers
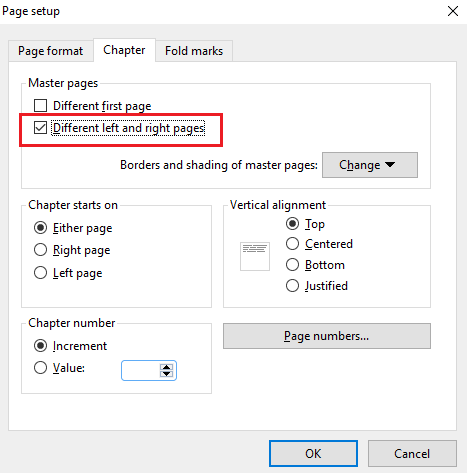
If you want page numbers to be printed at the outside margin of the pages, you should call up the command Layout | Chapter and put a checkmark in front of the option "Different left and right pages" in the section "Master pages":
Now go to the first page of your document and click on the dropdown arrow of the command Insert | Page number. In the dropdown list that now opens, go to Footer and choose one of the templates from the section Outside:
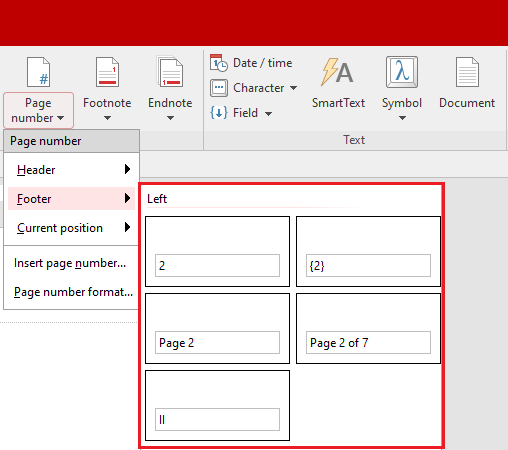
As a result, you should now receive a document in which the page numbers are right-aligned on odd-numbered pages and left-aligned on even-numbered pages.
2. Ready for printing!
As a first step, check if your printer driver supports brochure printing. For this, call up File | Print (Ctrl+P), click on "Setup" and look for a setting with the name "Brochure" or "Booklet":
Some printer manufacturers also offer convenient additional options, such as shifting the page margin or splitting up thick "books" into individual layers. Activate the desired settings and click on "Print" – everything else will be done automatically by your printer.
If your printer driver does not support brochure printing, the following workaround can be used: Export your document to a PDF file (File | PDF export). Then open this PDF file with Adobe Reader. (If you do not already have Adobe Reader on your computer, you can download it from the Adobe website without charge.) In Adobe Reader, call up File > Print, which opens up the Adobe print dialog.
Click on "Booklet" there:

A special advantage of the Adobe print dialog is its preview function. Without wasting paper, it lets you check on-screen if the result meets your expectations and, if necessary, change the settings appropriately.
Since the front and the back of each sheet must be printed for a proper brochure, a printer with an automatic duplex function is ideal. If your printer does not support duplex printing, you have to print twice. In the print window of TextMaker, first print with the options "Only odd-numbered pages" and "Reverse order". Then you take the printed stack of pages from your printer and print them once more, this time with the setting "Only even-numbered pages" – be sure to switch off the option "Reverse order".

About the author: Klaus Bailly is a former director of the Vogelsang High School in Solingen, Germany. He now lives in the port city of Lübeck where he spends part of the time of his "overactive" retirement as the ever-present SoftMaker Volunteer "Jossi", who helps users in deed and word in our discussion forum. If there is nothing to do there, he supports struggling candidates in the German version of "Who wants to be a millionaire?" by being a Phone-a-Friend lifeline. Yes, he gave the correct answer.
Notice: This blog post appeared originally on July 18, 2016 and was updated on October 18, 2021 to cover TextMaker 2021.
Comments
Like the instruction for making up booklets using Textmaker.
I absolutely love (Softmaker Free Office 2016). I do not use any thing else.
Like the newer added features.
Soft Maker continues to improve and is very reliable.
Kindly advise how to fix this problem.
With kind regards,
Rob.
One thing to consider is that some documents are really too big to be printed and bound as a single booklet. The stack of pages is too thick to be practical. If you wish to make a book with a very long document, consider printing it into a series of booklet sections consisting of 32 pages total. That is to say, eight sheets of full-size paper, folded in half to make a booklet of sixteen 'leaves' which double-sided hold 32 pages of material. This booklet of 32 pages is called a "signature" in book-binding parlance.
So a book of 256 pages would take eight 'signatures' of 32 pages printed from eight full-size sheets of paper. The signatures are each folded and bound, and then stacked and bound to each other to create the full-length book of 256 pages. If possible, leave the very first and last pages blank on both sides (for 252 printed pages), which can be pasted to a hard cover, if desired.
I have only attempted this once, with fairly good results. It is good to know the number of pages that can be folded into a booklet (eight full sheets folded for sixteen leaves holding 32 printed pages) in order to properly plan this kind of print job.