
Dear SoftMaker customers:
From time to time, we'd like to use our blog to give you targeted assistance for using SoftMaker Office to help you make the most of our office suite. We'll have a look at some frequently asked questions and go through the solutions step-by-step.
In the first installment of this new blog section, we'll take a look at...
Printing worksheets in PlanMaker
What can you do if a printed worksheet doesn't fit completely onto a page, for instance, or if you just want to print out part of the worksheet and not the whole thing?
Your results when printing out worksheets from PlanMaker essentially depend on three factors: the print range, the scaling mode and the repeating rows.
Print range
When you select the "Print" command in PlanMaker, the complete worksheet is always printed out by default (empty cells excluded).
What do you do if you just want to print out part of the worksheet? Simple, you define a print range. When you do that, only the cells located within the print range are active when you print out the worksheet. Nothing else gets printed.
You can define a custom print range for each worksheet in a spreadsheet file. You can do this really easily by simply highlighting the range you want to print and selecting File | Define print range.
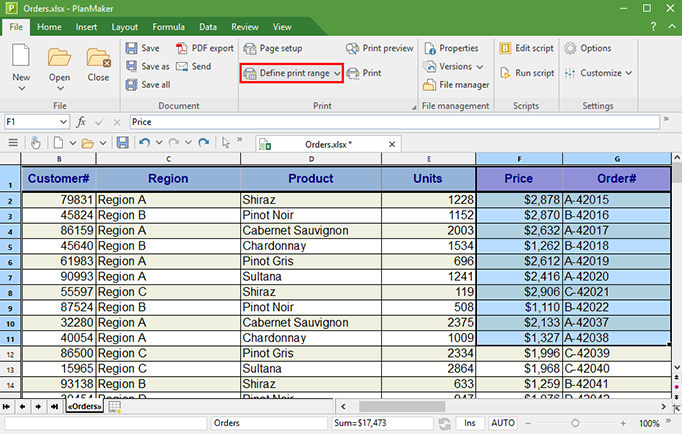
In the above example, only the range between cell F1 and cell G11 would be printed.
Tip: If you selected a print range but then decide that you want to print the whole worksheet after all, you can just tick the "Ignore print range" box in the print dialog window.
Scaling mode
We've all run into this problem: you print out a worksheet, and then you notice that a single column spills over onto a second page. That's not only a waste of paper, but it also breaks up the reader's overview.
The solution: scale the printout. If the worksheet doesn't fit on a piece of paper at full-size, it might fit at 98% or 95%. The minimal difference in font size is nearly imperceptible to the eye.
To specify, how the content of a worksheet should be scaled when printed out, PlanMaker offers you five different scaling modes:
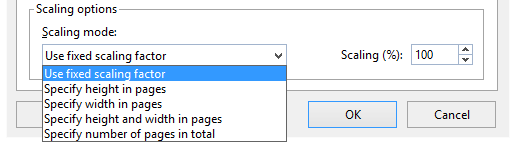
The default setting is a fixed scaling of 100% – that is, the widths of the columns and the height of the rows defined in the worksheet are printed out at a 1:1 scale.
If this results in columns unintentionally being distributed across several pages, it's easy to prevent this. All you have to do is select File | Page Setup | Options | Scaling options "Specify width in pages" and specify exactly one page as the width:

This lets you print worksheets – even sheets with many columns – conveniently and perfectly fitted to the width of a page; the height of the printout (and thus the number of pages) adapts to the number and height of the rows.
You can take a similar approach to printing worksheets with numerous rows on a desired number of pages. Select "Specify height in pages" from the "Scaling mode" drop-down menu.
If you want to make absolutely sure that your table will be printed on exactly one page, you can select the scaling mode "Specify number of pages in total" and enter the value 1 in the "Pages" field.
Please note that the scaling mode will be applied either to the print range or to the entire worksheet, depending on what is specified. Regardless of the selected scaling mode, the minimum zoom level is 20%, while the maximum zoom level is 200%.
Repeated rows and columns
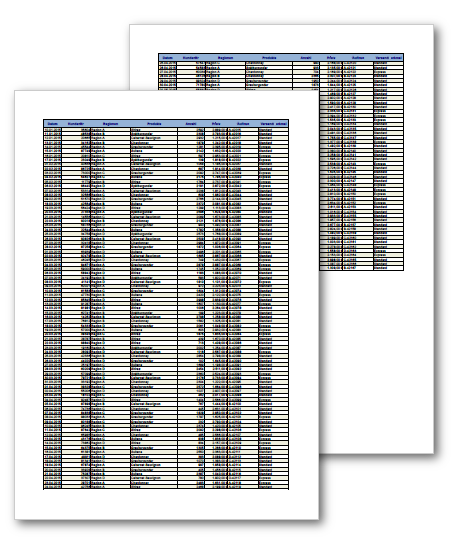
For lists that span several printed pages, column headings can be repeated on each page of the printout. This makes tables easier for readers to follow because they always know which column is which.
You can set up these repeating rows under File | Page Setup | Options, "Repeated rows":
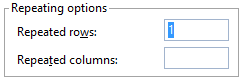
Once set up, the first row of the worksheet will appear at the top of every page:
Similarly, for very "wide" worksheets with many columns, columns can be repeated on each page of the printout.
Allowed values are whole numbers or areas defined with a colon. The entry "1:4" in the "Repeated rows" field would repeat rows one to four on every page of the printout.
We hope this article has given you some information you can use. In the comments section below, feel free to suggest other topics for us to address in the future.
Notice: This blog post appeared originally on June 24, 2016 and was updated on October 18, 2021 to include PlanMaker 2021.
Comments
After 12 pages, print preview only displays previous pages. To preview, I revert to resorting pages to previous positions to be able to preview. Is there a page limit or is there a page sequencing procedure
http://www.softmaker.com/en/support-assistant
Can PlanMaker print rows 1 to 50 on the left of a page, then 51 to 100 in the middle and 101 to 150 on the right thus saving two thirds of the paper needed?
Any idea what the problem is here. A bug in the software that you've had reported before perhaps?
Thank you for your help.
If that doesn't solve your problem, please contact our support team:
https://www.softmaker.com/en/support-assistant
It is possible to create this data validation? or planmaker does not has this feature?
thanks in advance.
Mobiletech Review
You can use the very same dialog box to export a complete list of all your shortcuts by clicking the "Export" button in the bottom left corner.
Technical support: https://www.softmaker.com/en/support-assistant
Technical support: www.softmaker.com/en/support-assistant
Also, why isn't the header and footer visible at all times?
Technical support: www.softmaker.com/en/support-assistant
I have tried all your recommendations, ie fit to 1 page etc, but I must still be doing something wrong.
Please can you advise.
Technical support: www.softmaker.com/en/support-assistant
Forgot to add, that it seems that the scale of the printing is too large.
I am trying to print columns A to U if that is any help.
Thank you
Lyn
Technical support: www.softmaker.com/en/support-assistant